
Tested and fully functional with the desktop version of Office 365!!
Analyze and report on raw data, quickly compare differences between two Excel worksheets, add images to spreadsheets that are sortable WITH data, and much, much more with this smart Excel add-in!
You get 12 powerful scripts to speed production, improve accuracy, enhance the functionality of your spreadsheets and make adding images to cells a breeze!
Download a PDF Copy of The Install and Basic Usage Guide
Download a PDF Copy of the BTApps™ User Guide (imaging capabilities)
Features of BTTools™:
- Insert Images Into Cells, Ranges & Merged Cells
- Analyze Raw Data Flatfile Worksheets, With Reporting
- Compare Worksheets With Difference Highlighting
- Reset Image Aspect Ratios on Worksheet
- Copy Text to System Clipboard
- Convert Selected Text from Text Number Format to Numeric Format
- Convert Worksheet Text Numbers to Numeric Format
- Paste Hyperlink Without Reformatting the Cell(s)
- Remove Hyperlink(s) Without Reformatting the Cell(s)
- Insert Row(s) While Preserving Formatting, and Insert Formulas Into the New Row(s)
- Insert Column(s) While Preserving Formatting, and Insert Formulas Into the New Column(s)
- Make a New Worksheet With Square Cells (Graph Paper)
Please read below the ‘Purchase’ button for more information about this software.
Please Note: If you are purchasing multiple copies of the software, a volume discount may be available. Please Contact Us for details if this applies to you.
|
Please note: This version of BTTools™ is not designed to work with Excel for Mac. If you intend to purchase this software for use on a Mac, you do so at your own risk. |
|
Please note: This version of BTTools™ is not co-compatible with previous versions of the standalone BTApps™. If you have a version of BTApps™ installed already, you will need to uninstall it before you proceed with loading BTTools™. As the version of BTApps™ that is loaded with this version of BTTools™ is the most current version, you will have the most possible features with this version. |
Copies:
BTTools™ for Excel Installation and Basic Usage Instructions
Brought To You By: The Wisconsin I.T. Guru – www.wisconsinitguru.com
Document Version: 2019.08.28.1630
Online Document Version: 2019.09.26.0430
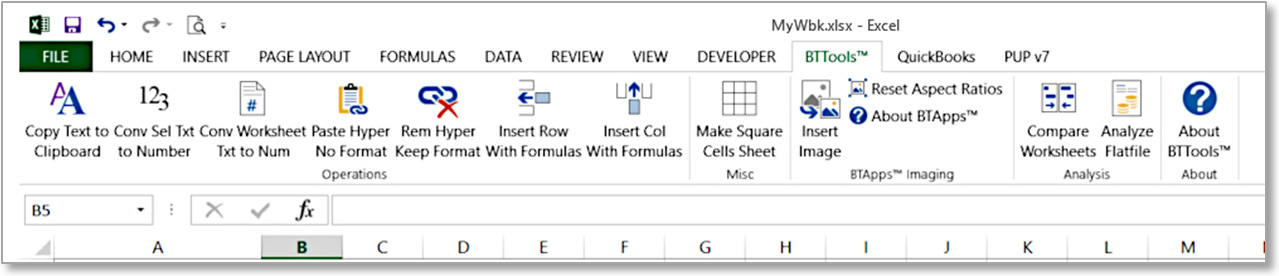
After you have successfully loaded the BTTools™ add-in to your copy of Excel (instructions below), you will see the “BTTools™” tab in the right-hand region of your ribbon. Click on the tab to utilize its features.

After you have clicked on the tab, you should see a series of buttons as in the image below. Click on the buttons to access their features.
This document contains information about:
- Loading the Add-In to Excel (PC Version)(below)
- Using the Add-In Functions (basic)
Loading the Add-In to Excel (PC version)
If you have received the add-in in a zip file format, you will first need to unzip the attachment, and save the add-in file to a folder on your computer. For the purposes of this example, we are going to assume that the file has been saved to the ‘C:\Users\Brian\Downloads’ folder. This folder also displays as ‘ThisPC › Downloads’ on the example computer.
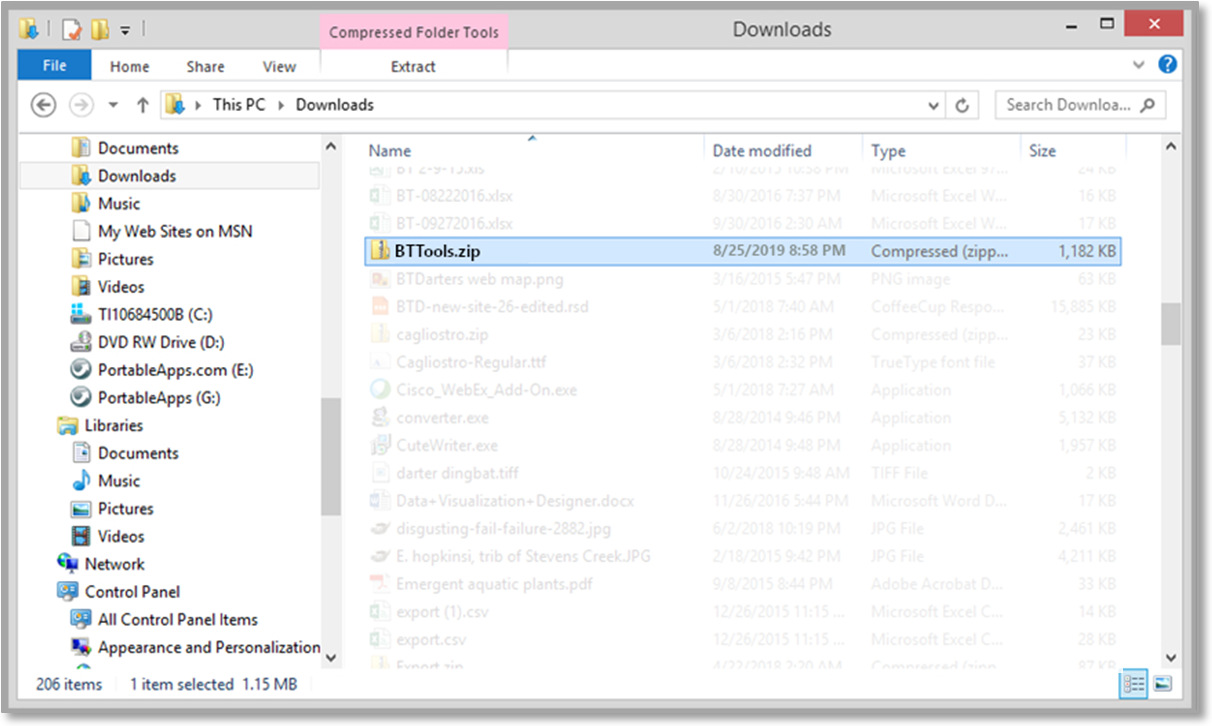
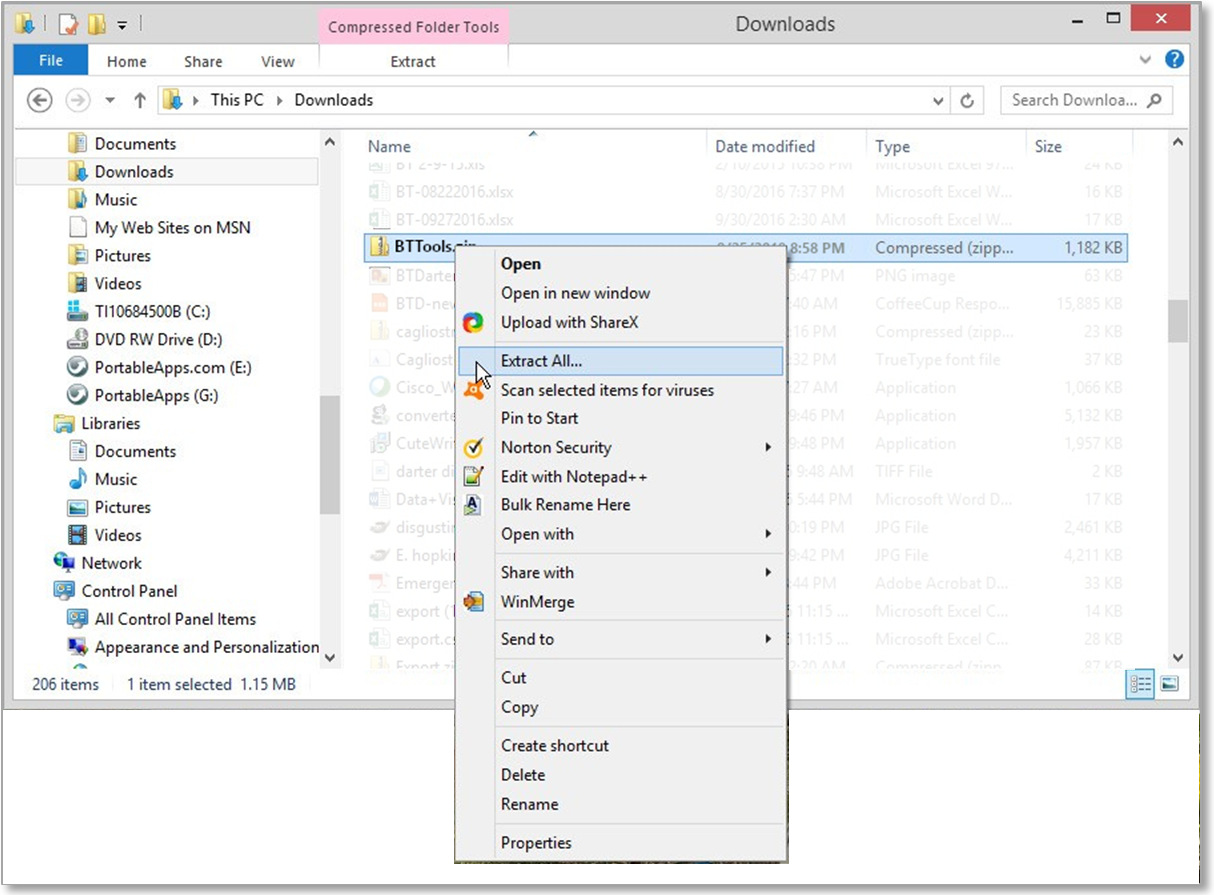
Now that we’ve located the zip file, we need to extract it to get its contents out. Right-click on the file and choose ‘Extract All’.
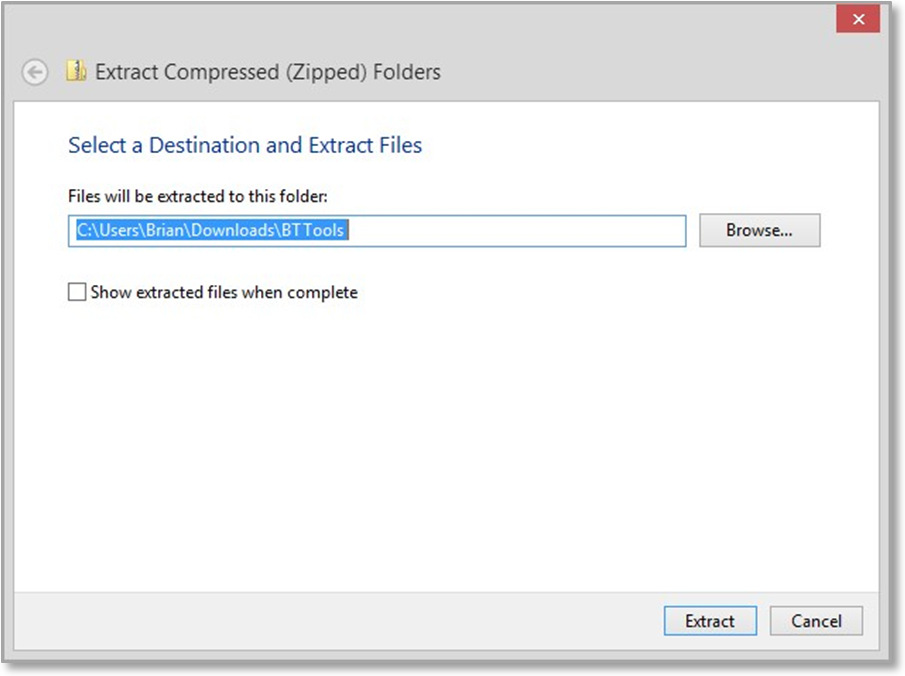
The ‘Extract Compressed (Zipped) Folders’ dialog will appear, as in the image below. For the purposes of this demonstration, we are going to use the default selected folder as the destination for our files. You are welcome to use any destination you like, though. Simply type a different directory in the text box or browse to another location using the ‘Browse…’ button. If you check the ‘Show extracted files when complete’ checkbox, another instance of Windows Explorer will open when the files have been extracted, showing the contents of the new folder. It is up to you if you want to do that. If you do not check the box, the files will still be extracted, you will just not see the files immediately after the operation is complete.
Click ‘Extract’ when you have chosen your desired location.
If you have selected the ‘Show extracted files when complete’ checkbox, the following window will appear. In it, you can see the unzipped files. If you did not check the checkbox, navigate to the location of the extracted files to see them.
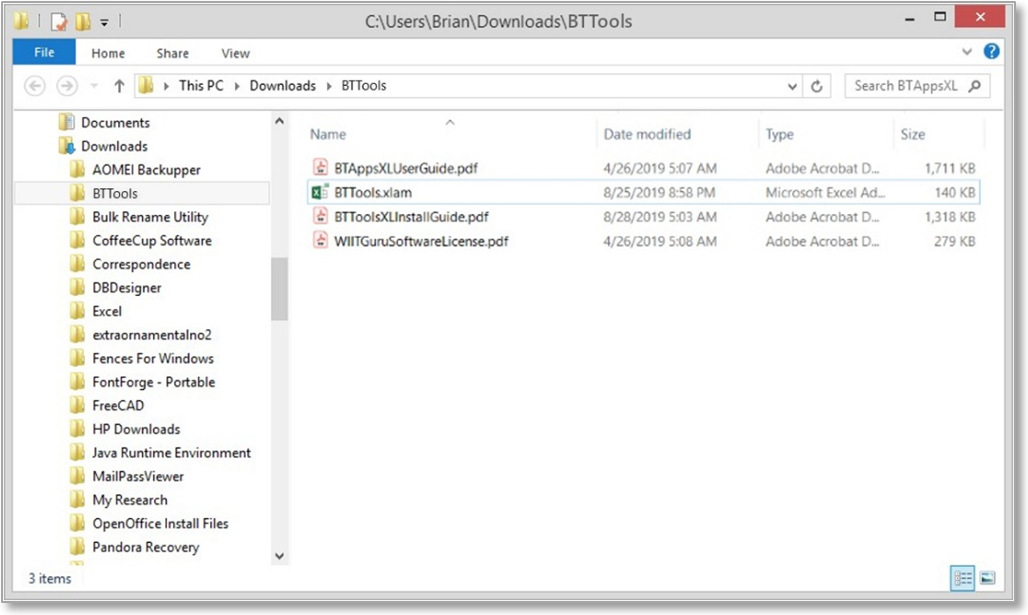
The ‘BTTools.xlam’ file is the actual in file which you will use to add BTTools™ to your version of Excel. The other files you see are the BTTools™ Install Guide (this document), BTApps™ User Guide, and a copy of our Software License Agreement. Please read the Software License Agreement carefully before using the software.
The easiest way to load our add-in to Excel is to move the add-in file (or a copy thereof) to Excel’s add-ins directory on your computer. That folder is usually located at ‘C:\Users\[Your_Name]\AppData\Roaming\Microsoft\AddIns’. In the case of this example, it is located at ‘C:\Users\Brian\AppData\Roaming\Microsoft\AddIns’. Let’s navigate to that folder in another instance of Windows Explorer.
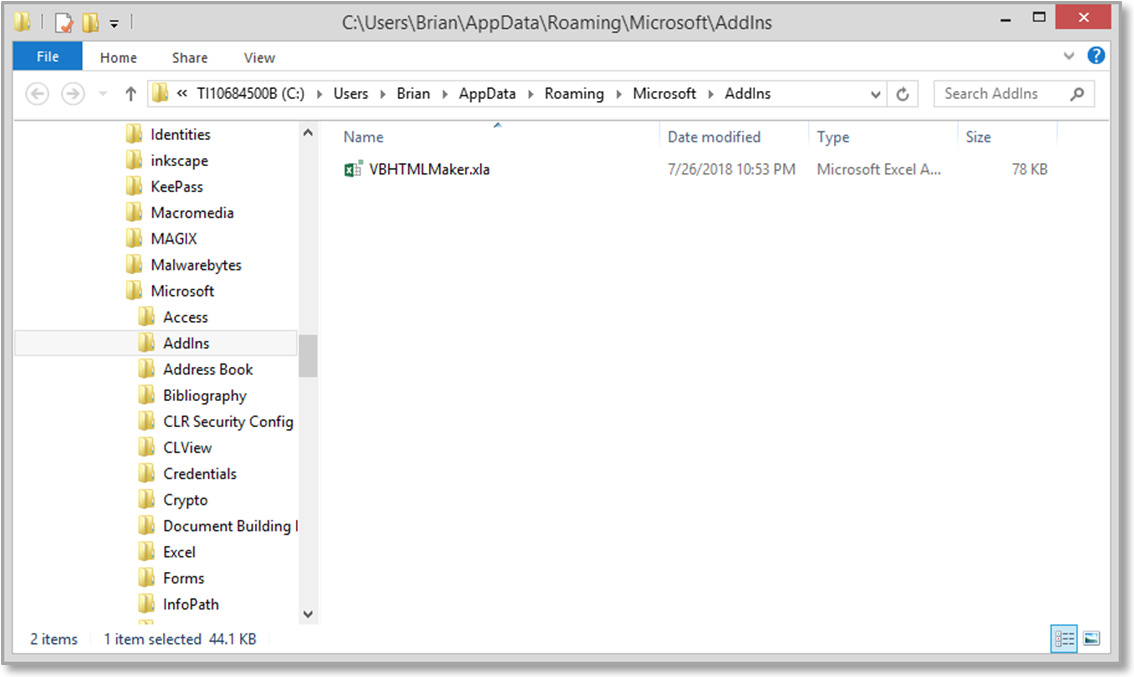
As you can see, there’s an add-in that we loaded previously already in that folder. If you have not loaded any add-ins to your computer, your folder may be empty. Regardless, this is where we want to place a copy of the BTTools™ add-in file.
Return to the Explorer window where you were previously viewing the unzipped files and copy the ‘BTTools.xlam’ file. Then paste it into the ‘AddIns’ folder. Our folder now looks like the image below.
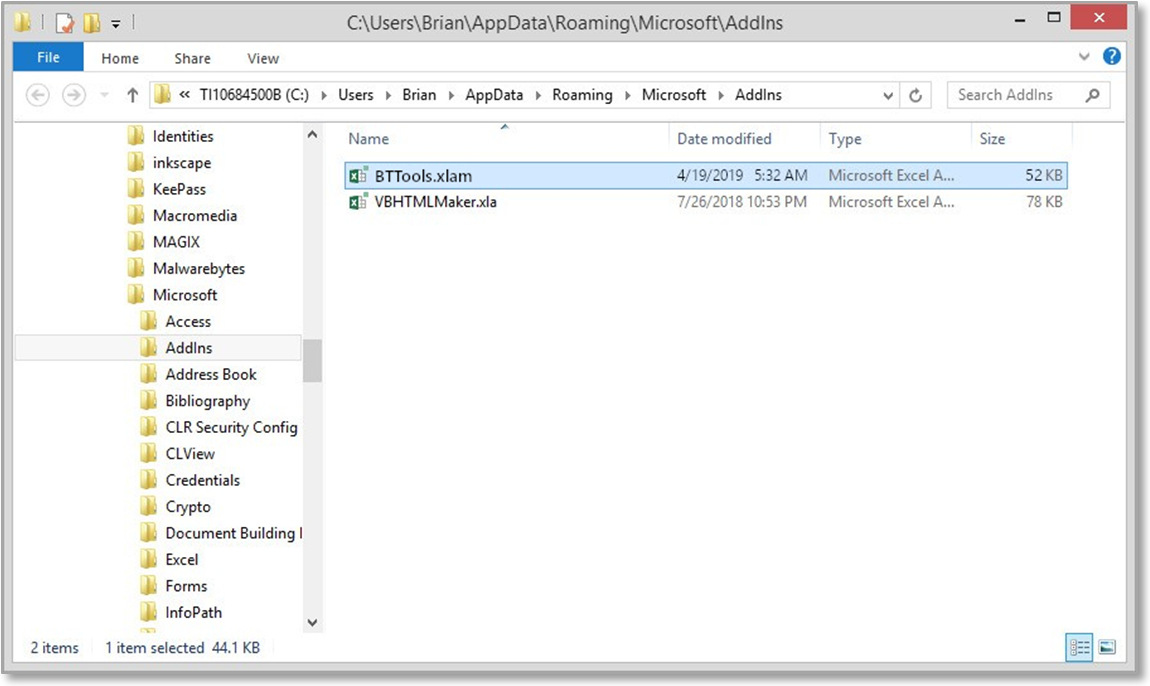
The add-in file is now in the correct directory to load it into Excel. If you don’t have Excel open already, please open it at this time.
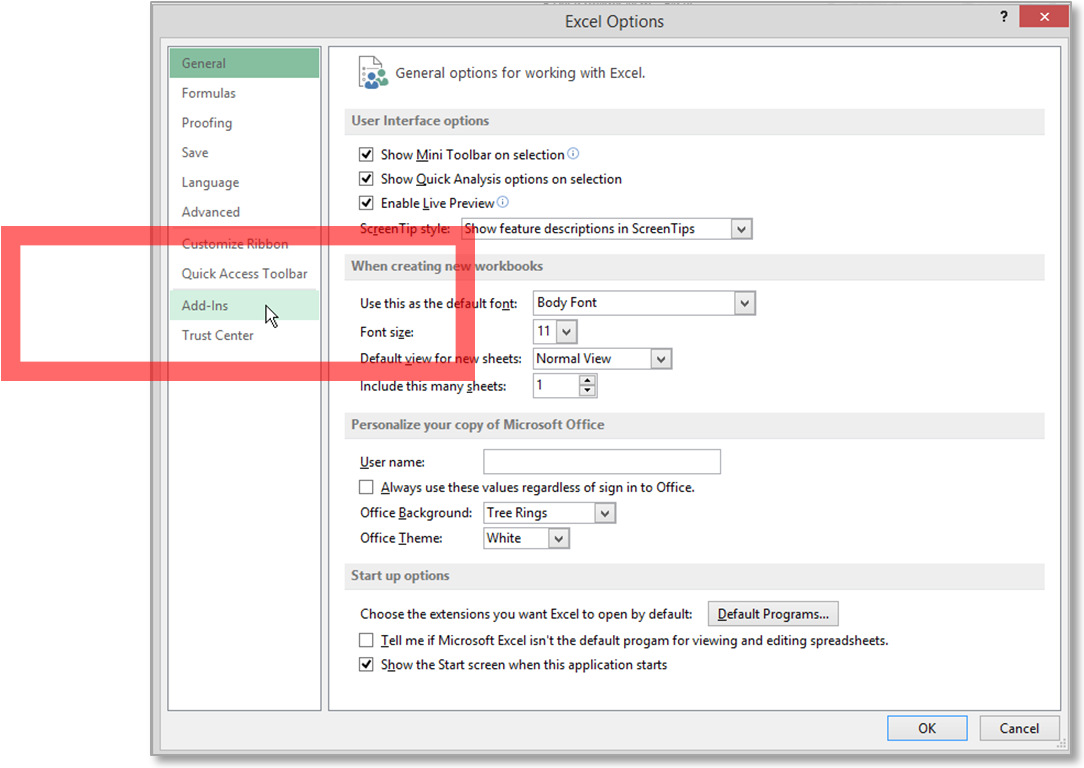
Once Excel is open, we need to activate the add-in to make it usable. Click on the ‘File’ menu in Excel. You will see that a menu on the left side of the window appears, as in the image below. We want to select ‘Options’ to continue.
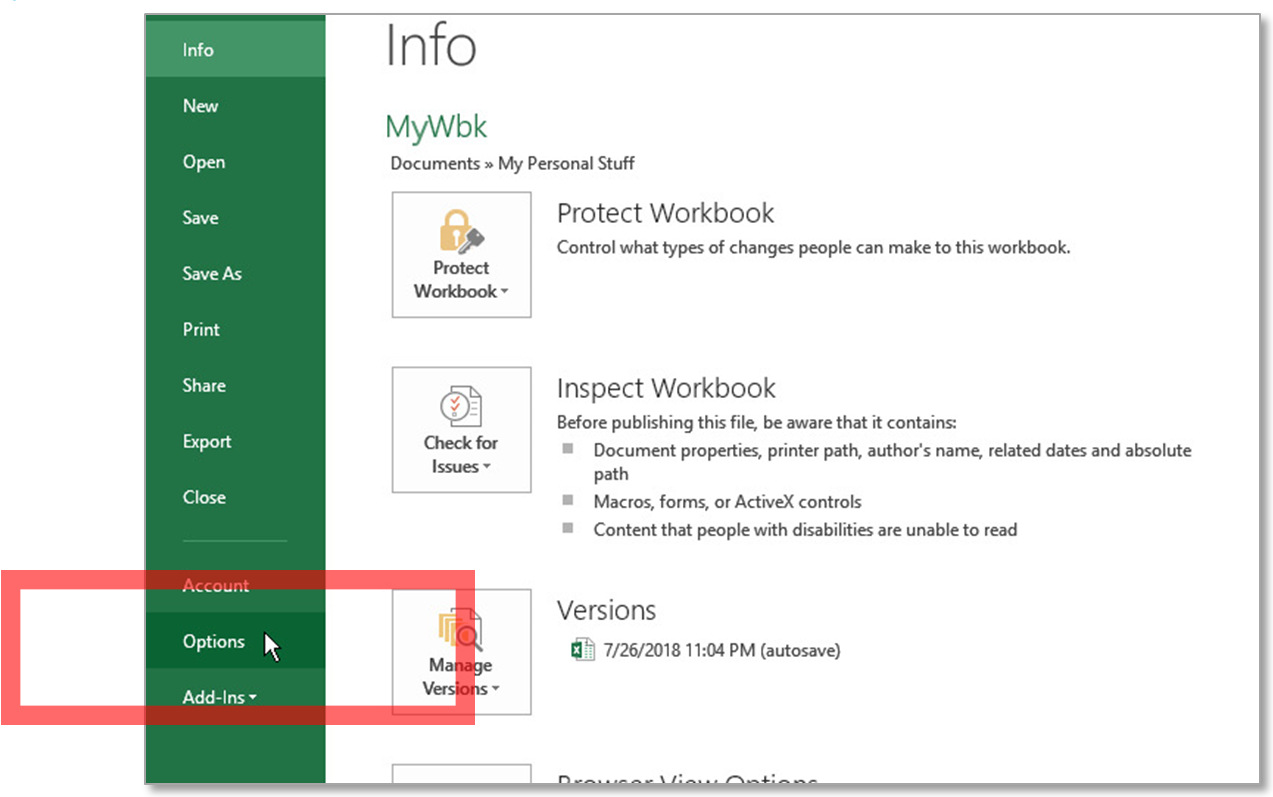
In the ‘Excel Options’ window that appears, select ‘Add-Ins’ from the left-hand menu.
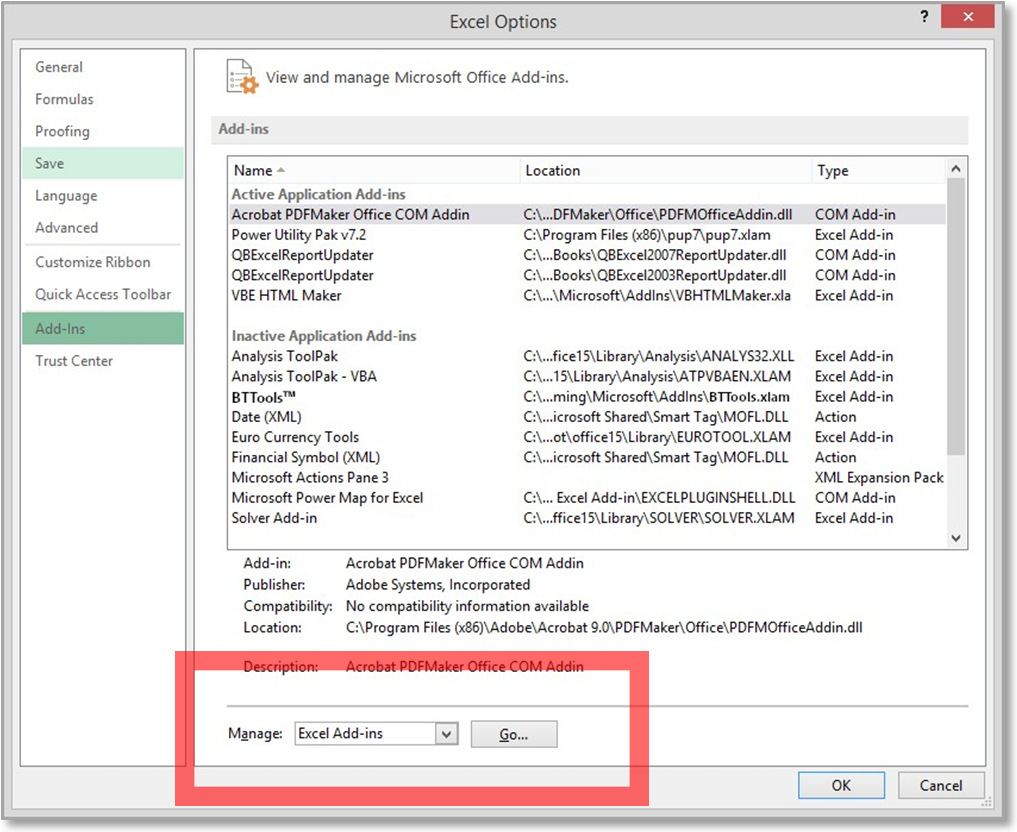
You will now see what add-ins are added to your version of Excel. To add BTTools™, we must look at the ‘Manage:’ area near the bottom of the window. Make sure that ‘Excel Add-Ins’ are selected from the drop-down next to ‘Manage:’. Then, click ‘Go…’.
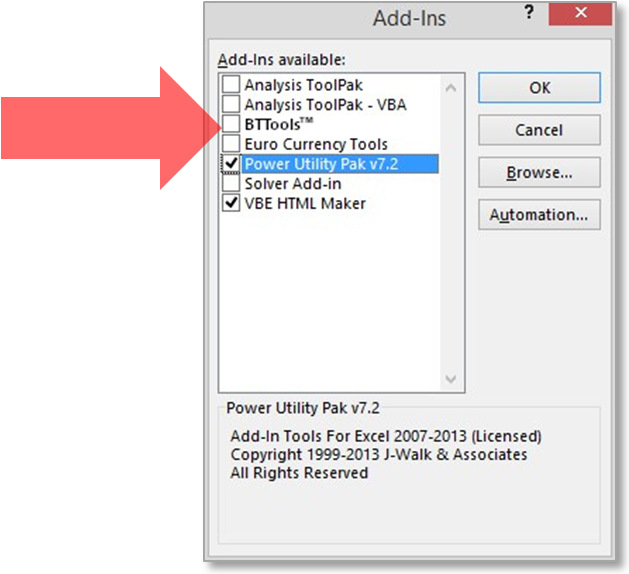
In the window that appears, you can see that BTTools™ is there, but it is not selected. Tick the checkmark next to BTTools™ and click ‘OK’ to activate the add-in.
Now you should see that the BTTools™ tab has been added to Excel, as in the image below. You’re ready to start using the add-in!

|
Tip: |
Now that you’ve added the add-in to your copy of Excel, it |
USING THE ADD-IN:
BASIC FUNCTION REFERENCE
USING THE COPY TEXT TO CLIPBOARD FUNCTION
Clicking this button will cause the visible text in the active cell to be copied to the system clipboard as unformatted text. This can be helpful when you want to copy the value produced by a formula, or to have access to the content of a cell without having the associated formatting.
This action does NOT alter the contents of the selected cell in any way.
USING THE CONVERT SELECTED TEXT TO NUMBER FUNCTION
Clicking this button will convert the numeric contents of the selection (cell or range) that are formatted as text to number format. This can be helpful when you import data that has numbers stored as text, such as from a CSV file.
This action does alter the contents of the selection, but ONLY the contents within the selection.
USING THE CONVERT WORKSHEET TEXT TO NUMBER FUNCTION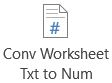
This button performs the same function as the ‘Convert Selected Text to Number’ button, but performs the operation for the entire active worksheet, not just the selection.
IT IS STRONGLY RECOMMENDED THAT YOU SAVE YOUR WORK BEFORE PERFORMING THIS OPERATION, AS IT CANNOT BE UNDONE.
Again, this action alters the contents of the ENTIRE SHEET.
USING THE PASTE HYPERLINK WITHOUT FORMAT FUNCTION
Clicking this button causes the contents of the system clipboard to be pasted as a hyperlink to the current selection (cell or range), without changing the formatting of the selection. Users who need to hyperlink large or small amounts of data may find this useful, as it differs from Excel’s standard functionality which alters the format of the selection when a hyperlink is created.
This action alters the contents of the current selection (cell or range.)
USING THE REMOVE HYPERLINK KEEP FORMAT FUNCTION
Clicking this button causes any hyperlinks within the current selection (cell or range) to be removed, without changing the formatting of the selection. Users who need to unlink large or small amounts of data may find this useful, as it differs from Excel’s standard functionality which alters the format of the selection when a hyperlink is removed.
This action alters the contents of the current selection (cell or range.)
USING THE INSERT ROW(S) WITH FORMULAS AND FORMATTING FUNCTION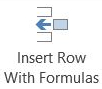
Clicking this button causes a row or rows to be inserted, similar to Excel’s ‘insert rows’ function. However, this function differs from the standard functionality in that it copies formulas and formatting from the row above the selection INTO the selection! This can be useful when you have a section of a worksheet that has complex formulas and formatting, but you need to insert a row into that section and have to make as few changes as possible to create the new functionality there.
This action alters the contents of the current selection (row or rows.) Until you are familiar with how this operation effects your worksheet, it is recommended that you save your work before performing this function.
USING THE INSERT COLUMN(S) WITH FORMULAS AND FORMATTING FUNCTION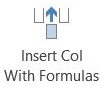
This button functions in the same way as the ‘Insert Rows With Formulas and Formatting’ button (above,) except that it inserts a column or columns instead of a row or rows.
This action alters the contents of the current selection (column or columns.) Until you are familiar with how this operation effects your worksheet, it is recommended that you save your work before performing this function.
USING THE MAKE SQUARE CELLS SHEET FUNCTION
Clicking this button presents you with a form which will allow you to select the column width for a new worksheet which will be created with square cells. This can be useful for anyone who wants to make graph paper or a pixel map.
This action alters the contents of the active workbook in that a new, blank, square-celled worksheet is added to it.
USING BTApps™ IMAGING FUNCTIONS
|
All BTApps™ functions are detailed in the separate “BTAppsXLUserGuide.pdf” that was included in the ZIP file with your BTTools™ installation. You may disregard the section about installing BTApps™, as your copy of BTTools™ is loaded with BTApps™ built-in! |
USING THE COMPARE WORKSHEETS WITH CHANGE HIGHLIGHTING FUNCTION
Clicking this button presents you with a series of forms which will guide you through the process of comparing two worksheets, with differences between the worksheets being highlighted in the second worksheet. This can be very useful for anyone who analyzes or quality-checks large amounts of data, or just needs to find out how two similar worksheets differ from each other.
Many types of differences are checked, such as: number or text differences, formula differences, value differences and error differences. Checking of differences in cell formatting is not available with this version of BTTools™.
This action alters the formatting of the second worksheet in the comparison, being called the ‘highlight’ worksheet. The ‘master’ worksheet is not altered in any way.
It is recommended that you save the workbook containing the ‘highlight’ worksheet before performing this operation. If you need an unchanged copy of the ‘highlight’ worksheet, it is recommended that you make a copy of that worksheet before performing this operation and use the copied worksheet as the ‘highlight’ worksheet.
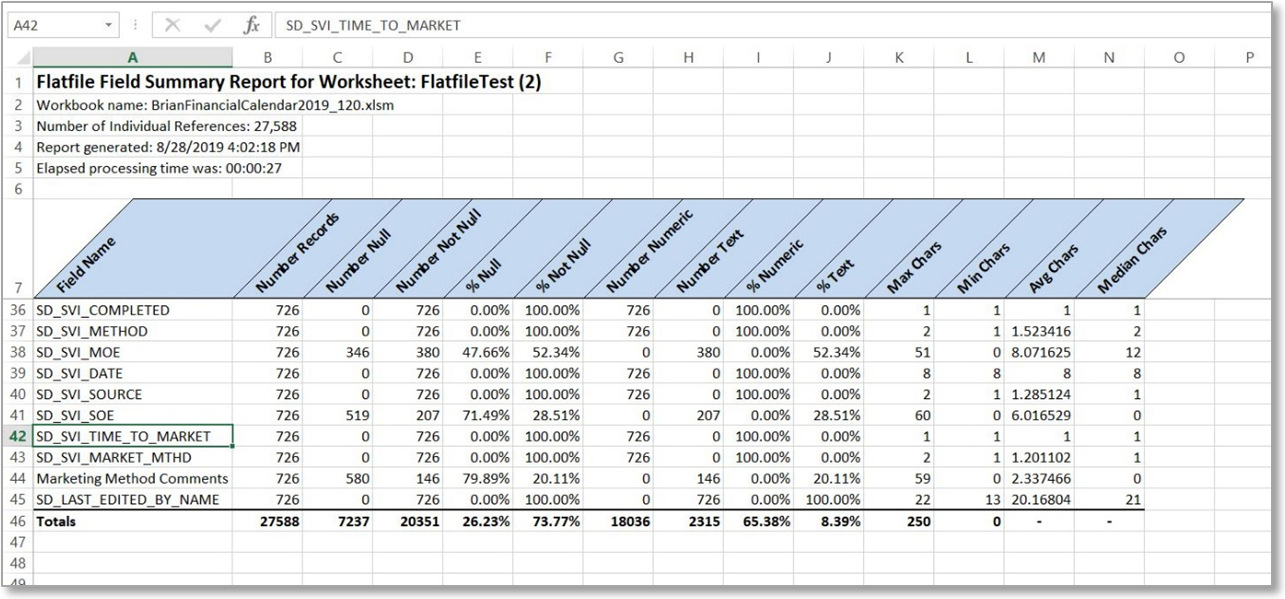
USING THE ANALYZE FLATFILE FUNCTION
This function performs an analysis of the active worksheet, which is assumed to be a ‘flatfile,’ with the first row being the field names, and every subsequent row being the data area. Clicking the button presents you with a form which further details requirements of performing the operation.
The output from the operation is a new worksheet in the flatfile’s workbook with detailed statistics about the data. Please see the image below for an example of the output.
It is STRONGLY recommended that you save the workbook containing the worksheet to be analyzed, as well as all other open workbooks, BEFORE performing this operation. Depending on the size of your flatfile, the operation can take a considerable amount of time and will ‘tie up’ Excel for the duration of the operation. You can track the status of the operation in Excel’s status bar, in the lower left-hand corner of Excel’s window.
To give you an idea of how much time it may take to run, on a PC with Windows 10 and an Intel i7 processor, it can take about an hour to analyze a million data points. However, a similar dataset with 30,000 data points, running on the same computer, only takes about 30 seconds to analyze. Please see an example of the reporting output of this function below.
|
Tip: |
This reporting function on raw data can be very useful for someone who needs to analyze a lot of raw data, but doesn’t want to pay a lot of money for standalone software to perform this function! |
CLICKING THE ABOUT BTTools™ BUTTON
Clicking this button presents you with a form which will display things like: the version of BTTools™ you are running, as well as contact information for The Wisconsin I.T. Guru. For more information, please visit our website or contact us through any of the means found at the end of this document.
Thanks!
The Wisconsin I.T. Guru
Brian J. Torreano

To purchase a copy of BTTools™ for Excel, please click the button below. If you’re purchasing multiple copies, volume discount pricing may be available. Please contact us for more information.
Thanks!
Build version of this document: 2019.08.28.1630
PDF version of this document
Online version of this document: 2019.09.26.0430
The Windows logo is a registered trademark of the Microsoft® Corporation. Usage within this document does not constitute an affiliation with, or sponsorship, endorsement or approval by Microsoft® of BTTools™, BTApps™, or Brian J. Torreano’s other products or services.